My Two-Day Solo MVP Project

YouTube Live

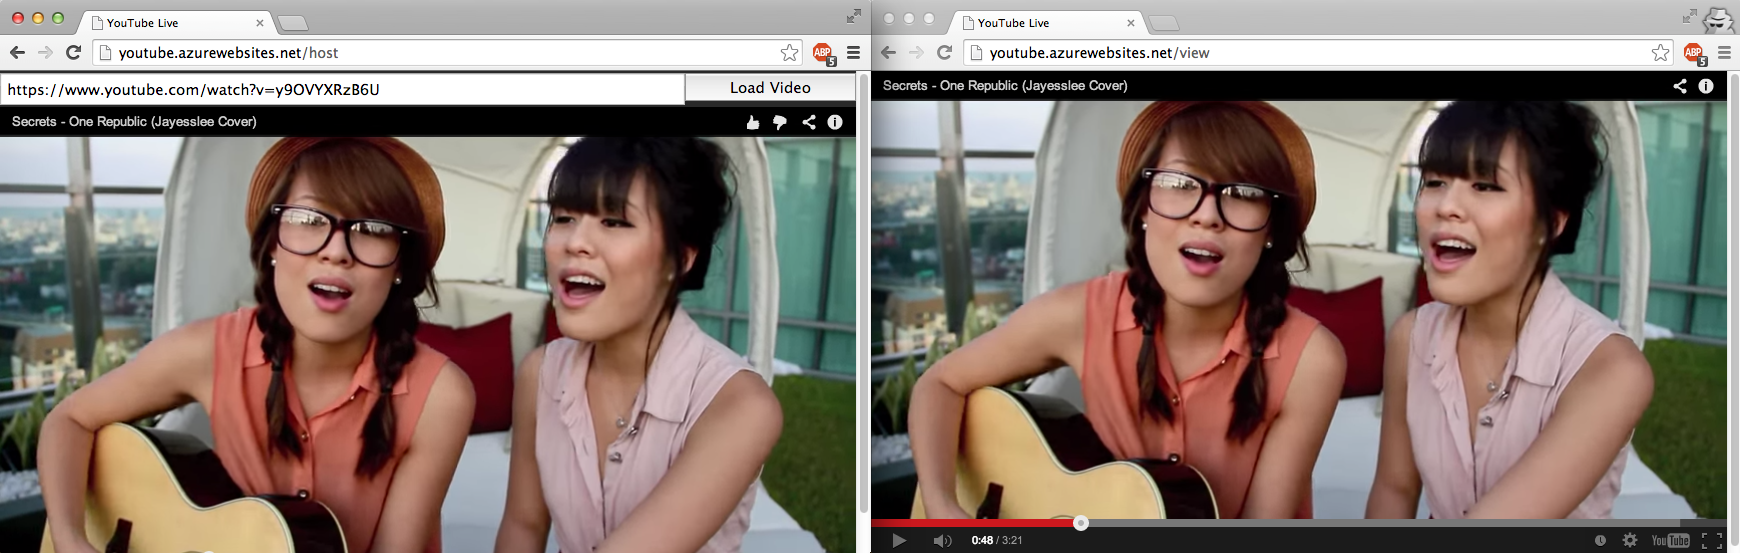
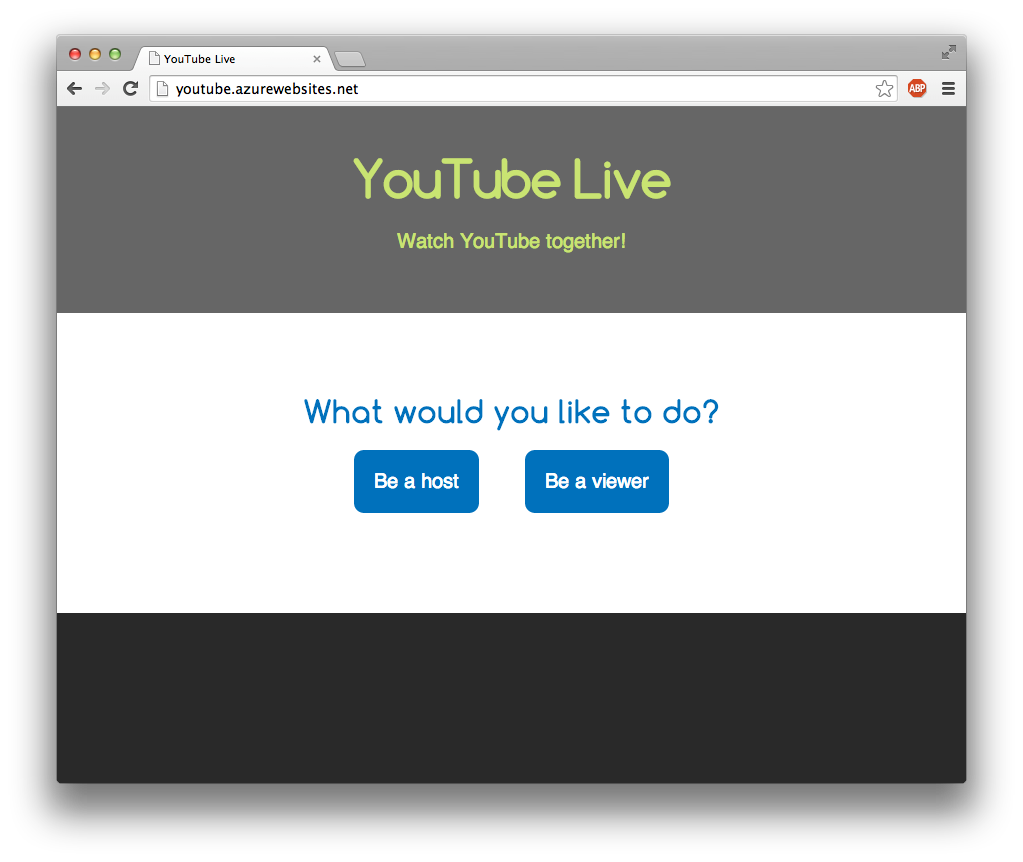
For my two-day solo Minimum Viable Product Project, I decided to make a website for sharing synchronized YouTube videos. This website would be good for people who want to watch a YouTube video together, at the same time, but aren’t in the same room. (Or maybe they are in the same room, but want to watch on separate devices.)

The user who enters a URL (a host) can play, pause, and seek the video. The users who watch the video (the viewers) will have their embedded players behave exactly the same as the host’s player. Pretty simple.

Scoping

My original idea had more features, but I quickly learned that I had to cut down the scope, and then cut it down again for it to be do-able in two days. I was going to have user sessions/authentication, rooms, and a chat box. I was also going to use Angular. But all those went away.

Requirements

The tools that I ended up using for this project are:

  • Node.js for the server
  • Firebase for the database
  • jQuery for getting the URL from the input box
  • YouTube Player IFrame API

Player API Functions

After embedding the YouTube player on my website, I needed access to some of the functionality. With the API, I was able to use these functions:

First, I use loadVideoById()  to load a YouTube video when a URL is submitted.

Then when the host’s player starts playing, the viewers will invoke playVideo() , otherwise pauseVideo()  in all other cases. I don’t use stopVideo()  because that will stop the player from buffering.

When the host is in paused state and moves the video to a new time position, this will invoke getCurrentTime() . The viewers will invoke seekTo()  to be at the new location.

Database

I’ve spent 15 minutes playing with Firebase during one of the other projects before, so I know how easy it is to set and get data. I love how Firebase automatically sends a trigger back to the website when a value is changed in the database.

In my Firebase database, I store 3 things:

  1. The state of the host’s video player (playing, paused, buffering, etc.)
  2. The YouTube video ID that the host is watching
  3. The time position of the host’s video player

Whenever host played or paused a video, Firebase sent a trigger which would invoke a callback function to play/pause all of the viewers’ video players. It was pretty simple.

If the host seeked the video ahead, Firebase would get the new time position, which would then again trigger a callback on the viewers’ video players and move them to the new time.

Same thing will happen when the host enters a new YouTube video ID.

Extra Feature

I also had some extra time, so I was able to add a search feature. The host can input search terms, and the first video result of the query will be loaded.

This is done by using the loadPlaylist()  function and passing this object for the argument:

{
  listType: 'search',
  list: 'the keywords to search'
}

Using this function will actually load a playlist of the first 20 videos found in the search, which I don’t want. So when the first video is playing, I invoke getVideoUrl()  to get the video’s URL, then I save the video ID to Firebase, and then play the video by ID to clear the playlist.

Stumbling Block

An obstacle that I ran into about 1 hour into the project was that I chose to use the YouTube Player JavaScript API. That doesn’t seem like a problem at all, right? Well, it wouldn’t be if the JavaScript API was able to embed the HTML5 video player. However, it only embeds the Flash video player, which iPhones and Androids don’t support! So the solution was kind of simple; I switched to the YouTube Player IFrame API.

Final Result

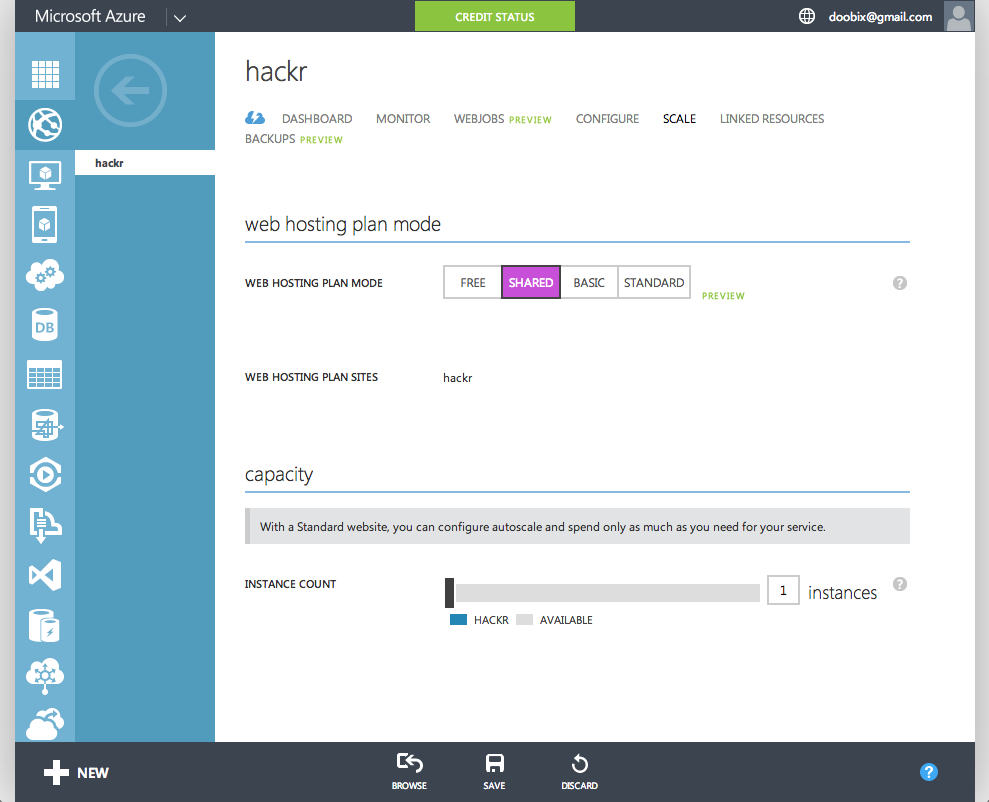
I deployed my code onto the Microsoft Azure platform, and you can view it here: http://youtube.azurewebsites.net/

YouTube Live Player

Adding a Custom Domain from Namecheap to Microsoft Azure

To add a custom domain name to a website hosted on Microsoft Azure (like this website), you must first go into the Azure’s SCALE configuration page and make sure the web hosting plan mode is anything above Free mode. For me, I picked Shared mode.

Web hosting plan mode

You’ll then see a “Manage Domains” button at the bottom of Azure. Click that and you will see “THE IP ADDRESS TO USE WHEN YOU CONFIGURE A RECORDS”. Keep note of the IP address.

First, we have to go into Namecheap. Click on the domain you want to use, and click “All Host Records” on the left side under Host Management.

We need to create one “A (Address)” and three “CNAME (Alias)” entries. Create the entries as shown below:

HOST NAME     IP Address/URL                         Record Type
@             <the IP address from Azure>            A
www           <website>.azurewebsites.net.           CNAME
awverify      awverify.<website>.azurewebsites.net.  CNAME
awverify.www  awverify.<website>.azurewebsites.net.  CNAME

Save the settings and you should be done with Namecheap.

Namecheap host records

Now lastly, go back into Azure’s “Manage Custom Domains” and type in the domain name that you’ve just configured. The input box should show a green checkmark indicating that Azure was able to communicate with your domain name on Namecheap.

Azure manage custom domains

Click the checkmark and you can now access your Azure website with your custom domain!

Becoming a Software Engineer

hackreactor

I quit my IT job 2 weeks ago so that I could attend a coding boot camp called Hack Reactor. It is a 12 week course (6 days a week, 11 hours a day) that started today. Based on the previous graduations, 99% of the students found a software engineering job within 3 months with an average starting salary of $105,000, as of this blog post date.

I’m super excited and can’t wait to see how much I will grow and where I will be after I graduate.

Samsung TV Overscan HDMI Fix

I connect my hackintosh to my Samsung TV to watch movies, but there’s a problem where the TV cuts off part of the edges.

tv1-edgecut

If I open up the OS X Displays Preferences, there’s a checkbox for “Overscan”. Unchecking it will show my entire desktop on the TV with nothing cut off, but now there’s a black border.

tv2-osx tv2-osxoverscanoff
So I’ve been using it like that for a few weeks now, but I decided to look for a fix to get rid of the black borders. I searched online and found this post from storageforum.net: How to Disable overscan on a Samsung “SMART” tv – solved

What the user Sol did was changing the “Edit Name” for the HDMI connection to “PC”. So I tried it out.

tv3-hdmi tv3-edit tv3-pc
Success?? No, not yet. It only made the black border even bigger for me!

tv4

I opened up the OS X Displays Preferences again, and turned Overscan back On, and voila! My whole desktop can be seen now, with no black borders on the Samsung TV!

tv5

P.S. My Samsung TV is new, and I haven’t removed the plastics and energy guide sticker yet. :)

TMS Cannot Upload New Software (404)

Our Cisco TelePresence endpoints are currently on TC6.0.1, while the latest being TC7.1.3. So I opened up TMS > Systems > System Upgrade > Software Manager; this is where we can upload the latest files to TMS, so the endpoints can download the updates easily.

Now the problem is when you click “Upload New Software”, select the TC7.1.3 pkg file, and hit the Upload button.

upload

Everything looks fine, right until the upload reaches 100%. At that point, it’ll show: “Server Error – 404 – File or directory not found.”

fail

The reason is that TMS only allows files that are ~300MB to be uploaded, and the TC7.1.3 pkg file is ~320MB… just a little bit over that upload limit.

The solution: Remote Desktop into the TMS server and edit the Web.config file, located at “C:\Program Files (x86)\TANDBERG\TMS\wwwTMS\”.

Find this line:

<httpRuntime maxRequestLength="307200" executionTimeout="300" requestValidationMode="2.0" />

And replace it with this line:

<httpRuntime maxRequestLength="512000" executionTimeout="300" requestValidationMode="2.0" />

Then find this line:

<requestLimits maxAllowedContentLength="314572800" />

And replace it with this line:

<requestLimits maxAllowedContentLength="512572800" />

This will increase the upload file size limit to ~500MB. Now restart IIS and the new limit will be used.

Tip: Copy the Web.config file to the Desktop and edit that copy. When finished editing, save it, drag it back into the wwwTMS folder, and click Replace file.

Migrating TMS Agent to TMS Provisioning Extension

One of the things that must be done first before upgrading Cisco TelePresence Management Suite from v13 to v14, is to migrate TMS Agent to TMS Provisioning Extension. My company’s TMS was on v13.1, and the latest version was v14.3.2. After reading through the upgrade guides, I figured out that my steps had to be done in this order:

  1. Upgrade TMS from 13.1 to 13.2.x.
  2. Install TMSPE 1.0.
  3. Upgrade TMS from 13.2.x to 14.3.2.
  4. Upgrade TMSPE from 1.0 to 1.1.
  5. And finally upgrade TMSPE from 1.1 to 1.2.

This should have been pretty easy and straight forward, but we wanted to migrate TMS from its physical box to a virtual machine. So what I did was installed a fresh copy of TMS v13.1 on a brand new Windows Server 2008 R2. I did a SQL backup from the physical box and restored it to our SQL server that we wanted to use. Then I upgraded TMS v13.1 to v13.2.

This is the point where I thought all the data was restored, upgraded, and ready to be migrated. I installed TMSPE and ran the migration tool, but for some reason it said Migration Successful with 0 users migrated.

finish1

I was confused, so I had to do a bit of googling. Thankfully, I was able to find this post written by cfiestas on the Cisco forums: How to transfer OpenDS/Provisioning VCS data to TMS for recovery purposes. It turns out that the TMS Agent database isn’t stored in the SQL database; the TMS Agent data is stored in C:\Program Files\TANDBERG\TMS\Provisioning\OpenDS-2.0\db\userRoot. So I went to that path on the physical TMS box, and copied the folder over to the new virtualized TMS.

opends

This time when I reran the TMSPE migration tool, 37 users were migrated successfully! Now I am able to upgrade TMS v13.2 to v14.3.2, and upgrade TMSPE to v1.2.

finish2

TMSPE Installation – SQL Authentication Error

Upgrading an old version of the Cisco TelePresence Management Suite (v13.1) to a newer version (v13.2+) needs TMS Agent to be migrated to TMS Provisioning Extension.

When running the TMSPE installer (TMSProvisioningExtension.exe), it will ask you for the SQL server that you want to use.

tmspe1

After entering the correct information, you may encounter this error message:

“A network-related or instance-specific error occurred while establishing a connection to SQL Server. The server was not found or was not accessible. Verify that the instance name is correct and that SQL Server is configured to allow remote connections. (provider: SQL Network Interfaces, error: 26 – Error Locating Server/Instance Specified)”

tmspe2

The solution is very simple; the installer needs to know what the port number of the SQL Server is. All you have to do is change <SQL Server Name> to <SQL Server Name>:<port number>! In my case, the SQL Server was using the default port (1433). So I just had to change “sql-06” to “sql-06:1433”.

tmspe3

Building a Hackintosh

I have a 13″ MacBook Pro with Retina display that I use as my main computer for everything I do at home, and I thought it’d be good enough for gaming. However, I started playing Counter-Strike: Global Offensive, and there is noticeable lag every now and then, especially in big maps that have a lot of objects to render. I had to lower the game resolution to somewhere around 720p, and only had the graphics settings on medium. Even then, I wasn’t happy with the low FPS I was getting.

This made me rethink about using a MacBook as my main machine. Since it was on my desk 99% of the time anyway, I should just use a desktop computer, right? I wanted a more powerful machine that could handle gaming, I still wanted to use Mac OS X, and I wanted it to be cheap (price wise). So what better thing to do than to build my own Hackintosh!?

The first thing I did was to head over to tonymacx86.com to check out this article: Building a CustoMac: Buyer’s Guide May 2014. That article provides a list of the easiest and best supported hardware options for installing Mac OS X.

The Parts

Like I mentioned above, I didn’t want to spend a ton of money on expensive parts, but still wanted it good for gaming. So the parts that I picked out are:

The total came out to be $1,259.55… which is a just little above what I paid for my MacBook.

The Installation

For the most part, it was pretty straightforward using this guide: UniBeast: Install OS X Mavericks on Any Supported Intel-based PC

To summarize my installation steps:

  1. Download Mavericks from the App Store on existing MacBook.
  2. Plug in a USB flash drive to make an OS X installer.
    • Make it 1 partition, set the option to Master Boot Record, format it to Mac OS Extended (Journaled).
    • Run Unibeast and let it put the Mavericks installer in the flash drive.
    • Copy MultiBeast into the finished flash drive.
  3. Turn on the newly built computer and change some of the UEFI settings.
    • Loaded Optimized Defaults.
    • Set X.M.P. Memory Profile to Profile1.
    • Change XHCI mode to Auto instead of Smart Auto.
    • Set EHCI to Enabled.
    • Set XHCI to Enabled.
  4. Boot up from the USB flash drive.
  5. Open Disk Utility and format the SSD.
    • Create 1 partition, Option: GUID Partition, Format: Mac OS Extended (Journaled).
  6. Install OS X Mavericks to the SSD.
  7. Now OS X should be running, open MultiBeast to install some drivers and tweaks to make the Hackintosh run better.

The End

This entire process took about 3.5 hours. Here’s the rough timeline of my steps:

  • I started building the computer around 5pm and finished building around 6:30pm.
  • The UniBeast part took ~20 minutes. I should’ve had this step running while I was building the computer.
  • Changing the UEFI settings took ~10 minutes. I was getting a kernel panic while booting into the installer, so I had to search online to see which settings worked.
  • Installing OS X took ~20 minutes.
  • MultiBeast took ~10 minutes. I looked online to see which checkboxes other people with a similar build had enabled.
  • I transferred Counter-Strike: Global Offensive files (~8GB) from my MacBook to my Hackintosh, which took ~20 minutes.
  • By 8:30pm, I got on Steam and was able to play Counter-Strike in 1080p on high graphics settings. And. It. Was. Smooth!

Overall, it was a pretty painless process and I am very happy with my new Hackintosh.

HackPro

P.S. Although the Logitech C920 webcam captures crispy clear images, it has a TERRIBLE microphone… it makes me sound muffled and far away. I will definitely replace this webcam with one that has a better mic, which is what I really care about because I talk online with my friends in Mumble everyday.

Cisco VCS Insecure Password in Use

We had a Cisco TelePresence Video Communication Server on version X7.1. The newest version is X8.1.1, so my task was to upgrade it, which went very smoothly! The only warning alarm that popped up was this message: “Insecure password in use – The root user’s password is hashed using MD5, which is not secure enough”

vcs-alarm

The solution is quite simple — we just have to SSH into the VCS with the root user account and change the password. On Windows you can use Putty. Since I’m on a Mac, I can open up terminal and type: ssh root@<ip-address> Type in the current password to log in, then type passwd to create a new password, and you’re done!

vcs-ssh

The reason is that after version X7.2, Cisco changed the hash method from MD5 to SHA512. Administrator account passwords are automatically rehashed after the upgrade, but not the root account.

vcs-fixed

No more tickets now!

Scheduling PHP Cron Jobs with Parameters

I was making a PHP script for reading a resource account’s calendar from an Exchange server and then saving the data to a MySQL database. This script was going to be a cron job on the web server set to run every 2 minutes, and I was going to have multiple cron jobs for reading different resource account calendars.

Instead of having separate cron files for reading each account, I made one cron_rooms.php file that I could use with the HTTP $_GET variable. The PHP script worked great through the web browser, and the URL was something like this: http://website.com/cron_rooms.php?room=[name]

To schedule the cron jobs, I added them easily through the webmin web control panel in the browser.

webminCron

To do it through command line in SSH, I’d run this command: crontab -u <username> -e

Then I’d enter the lines below for updating my 5 rooms every 2 minutes.

0,2,4,6,8,10,12,14,16,18,20,22,24,26,28,30,32,34,36,38,40,42,44,46,48,50,52,54,56,58 * * * * /usr/bin/php -q /var/www/cron_rooms.php?room=dsv #Update DSV
0,2,4,6,8,10,12,14,16,18,20,22,24,26,28,30,32,34,36,38,40,42,44,46,48,50,52,54,56,58 * * * * /usr/bin/php -q /var/www/cron_rooms.php?room=9991 #Update 9991
0,2,4,6,8,10,12,14,16,18,20,22,24,26,28,30,32,34,36,38,40,42,44,46,48,50,52,54,56,58 * * * * /usr/bin/php -q /var/www/cron_rooms.php?room=9992 #Update 9992
0,2,4,6,8,10,12,14,16,18,20,22,24,26,28,30,32,34,36,38,40,42,44,46,48,50,52,54,56,58 * * * * /usr/bin/php -q /var/www/cron_rooms.php?room=9993 #Update 9993
0,2,4,6,8,10,12,14,16,18,20,22,24,26,28,30,32,34,36,38,40,42,44,46,48,50,52,54,56,58 * * * * /usr/bin/php -q /var/www/cron_rooms.php?room=9994 #Update 9994

So anyway, all is good and ready to go, right?… Wrong!

When the cron job runs, it’s giving me these errors:

Could not open input file: /var/www/cron_rooms.php?room=dsv
Could not open input file: /var/www/cron_rooms.php?room=9991
Could not open input file: /var/www/cron_rooms.php?room=9992
Could not open input file: /var/www/cron_rooms.php?room=9993
Could not open input file: /var/www/cron_rooms.php?room=9994

Why was the script working in the browser, but not in cron? Simple, the script I made was using HTTP GET requests that works for URL’s. When running in command line mode (which is what cron is using) I need to pass the parameters using arguments.

Solution: I replaced the $_GET[‘room’] variable in my script with $argv[1]. Then change each line in cron from this:

/usr/bin/php -q /var/www/cron_rooms.php?room=[name]

to this:

/usr/bin/php -q /var/www/cron_rooms.php [name]

In command line mode, $argv[0] will always contain the path of the script: “/var/www/cron_rooms.php”

And $argv[1] would be the first argument after the path: [name]

If we had more arguments, we can access them with $argv[2], $argv[3], etc.